I don’t know if you have noticed more recently that your website has been getting lots of spam visits. These aren’t real visits to your site, but will be messing up your analytics data. They are actually fake referrals and are not linking to you at all. These fake referrals are created by spammers to trick google analytics in the hope that you will visit their site. If you have ever visited one of these sites, you’d been redirected to an online store, marketing scam or malware site.
If you want to see this for your website go to your Google Analytics data (Reporting > Acquisition > All Traffic > Source/Medium). I’ve added a screenshot of the referrals for a website I manage, and as you can see, we have several spam referrals.

These spam visits can have a massive impact on your Google Analytics data. It is more apparent if you run a small site compared to a website getting 1000’s visits a day. I’ve analysed the data above and this is what I’ve found.

I highlighted the spam with red and actual referral sites in green. As you will be able to see at the bottom of the data 70.99% of the referrals were from spam! Thinking you might have an issue with your site as you might have a high bounce rate, but once you take out the spam it drops by 29%. This is how crazy effects it can have and this is the reason we need to take this out of our data we analyse.
So how do we stop this? Honestly, it’s currently not possible but what we can do is hide this data within our Google Analytics account. To do this, follow the steps below and I’ll show you how I deal with this issue. I’m sure there are alternative ways out there to fix this issue, but this is what works best for me.
Step One – Create New View
What you want to do is create a separate Google Analytics view. Once you have this set up, we can go ahead and apply a spam filter to the new view you have created. You should always have an unfiltered view, and then a secondary view that you apply your filters to.
Step Two – Create Filter
To create a filter, what you need to do is: click on Admin in the top navigation and then select the view you want to apply the filter to (in this case we are applying it to the Master View we just set up). And then click on filters.
Admin > Select View > Filters
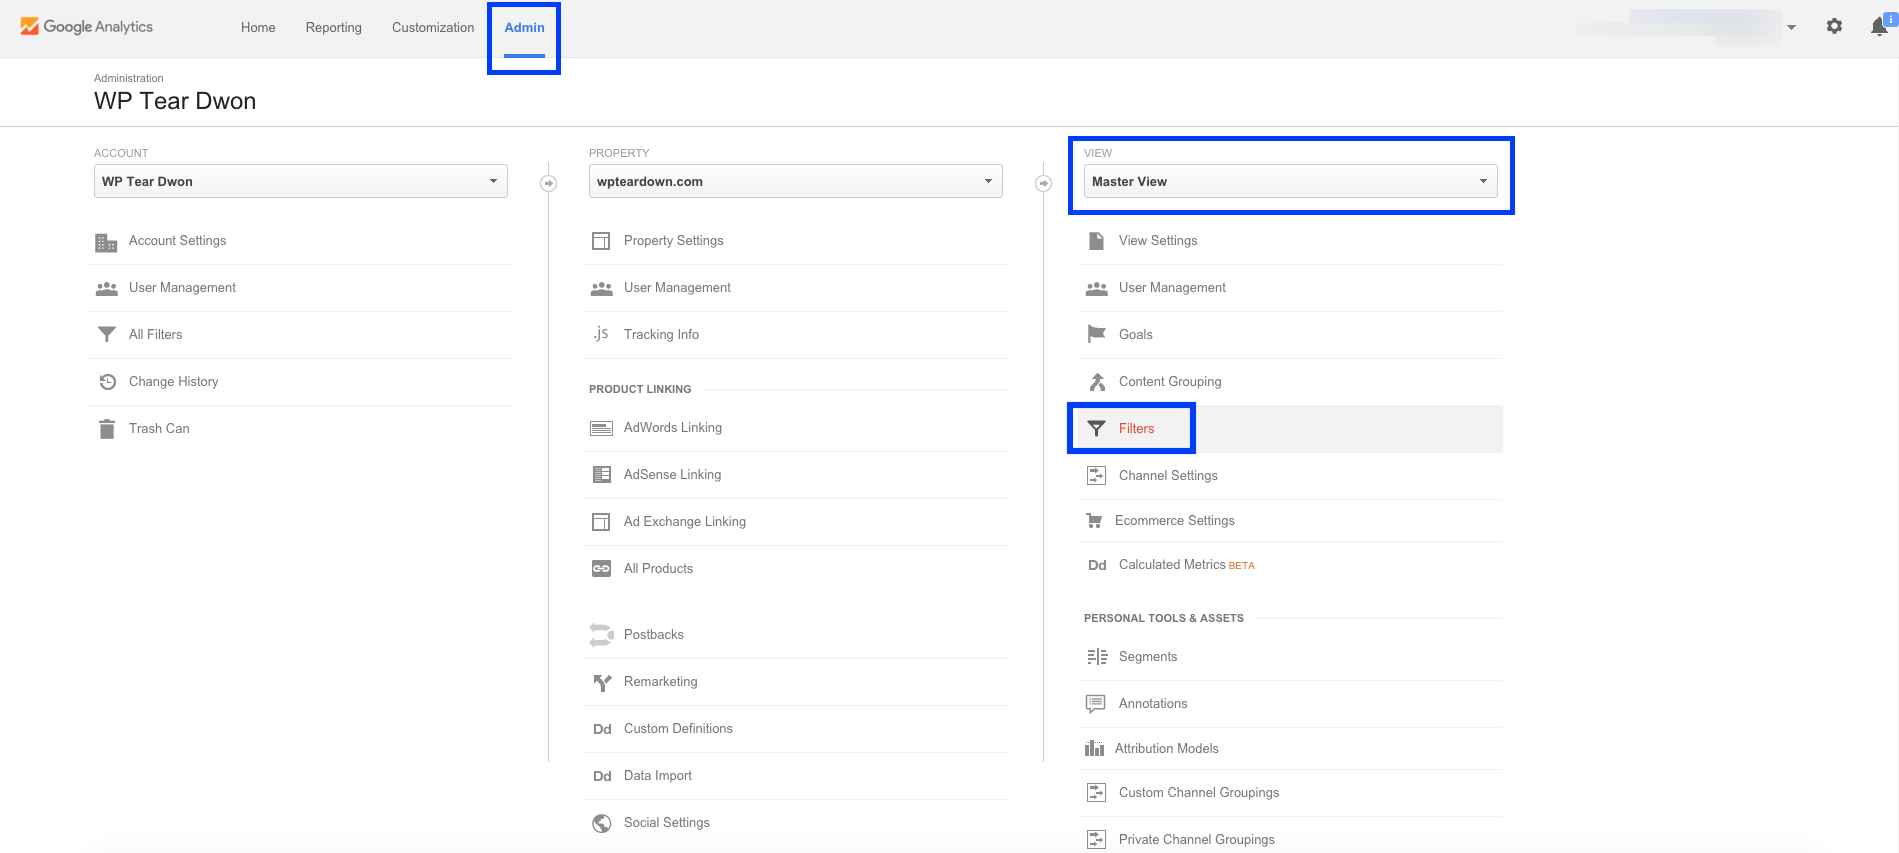
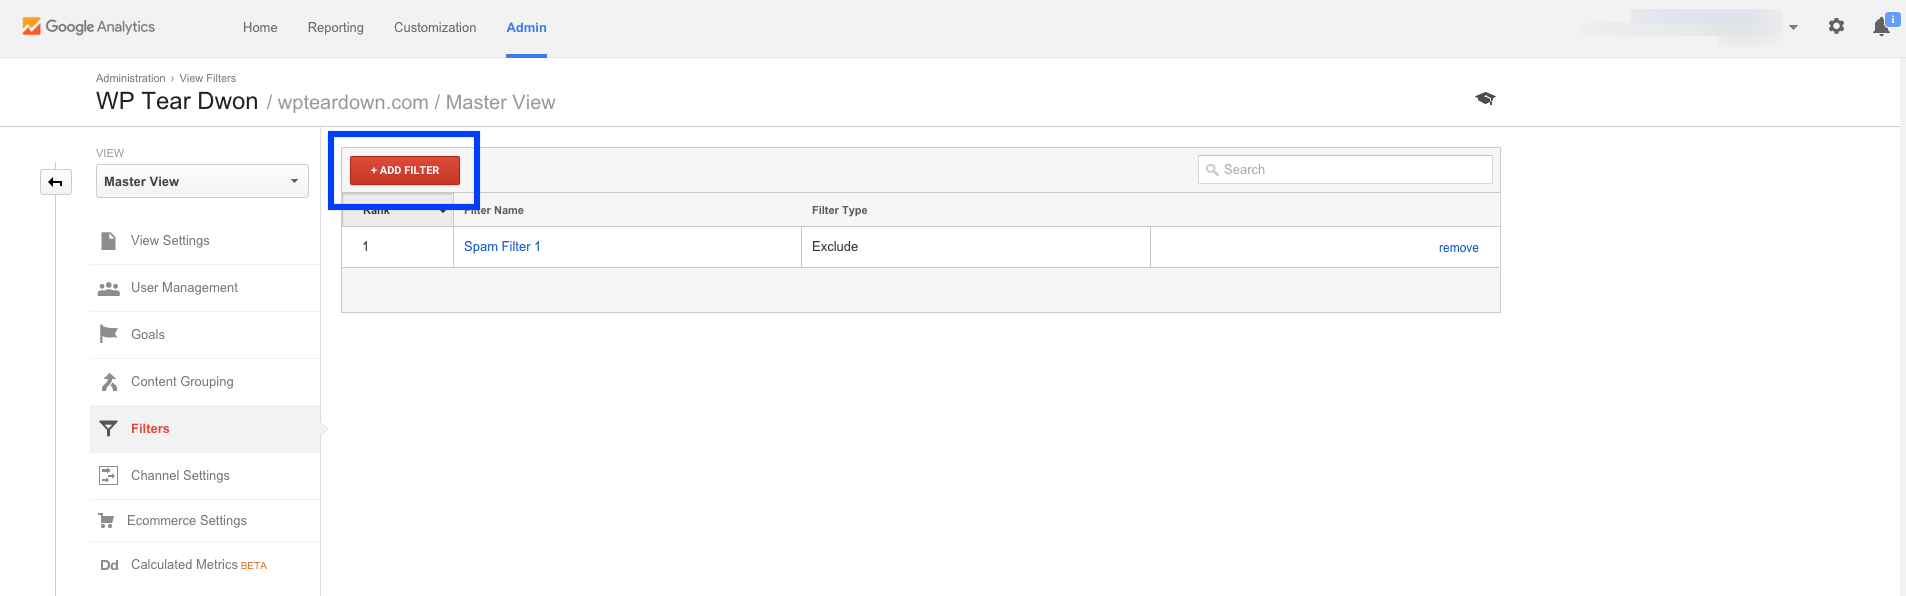
To add a new filter, click: + ADD FILTER
Step Three – Filter Settings
You will now need to set up the filter settings. Firstly, you need to set the Filter Name (I chose to call it “Spam Filter 1”). Next, you need to select the Filter Type to “Custom” and then select Campaign Source in the Filter Field drop down.
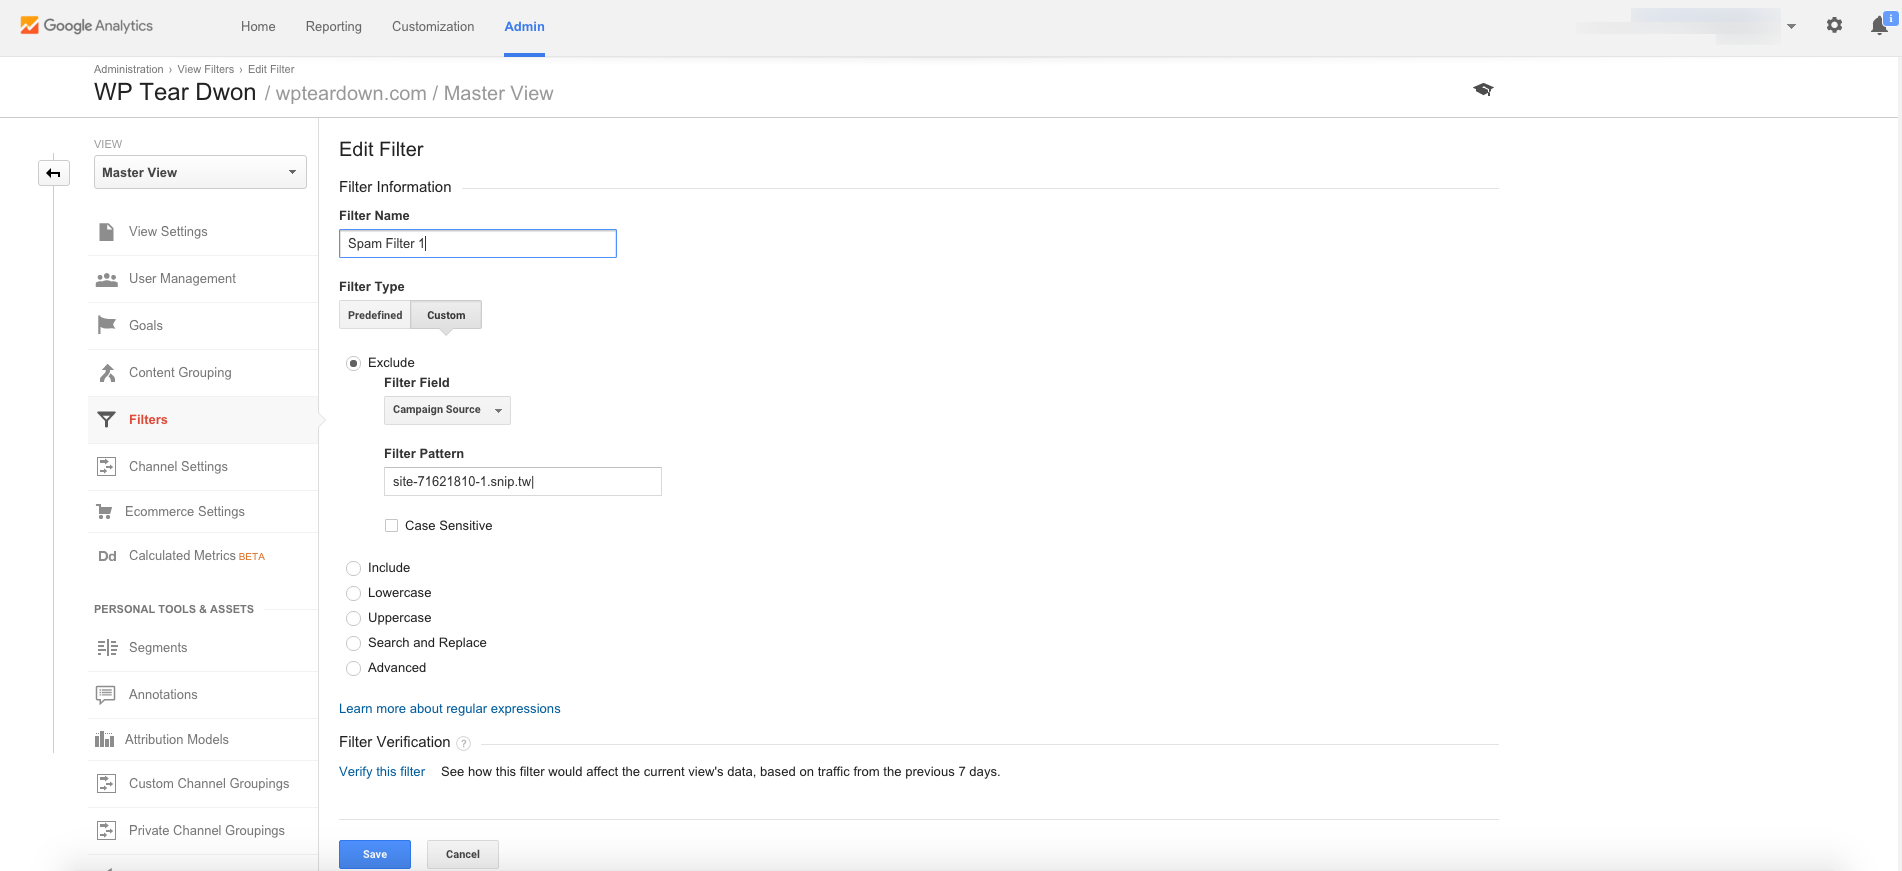
Custom > Campaign Source > Ghost Spam URL’s
Next, you want to add the spam URLs that are targeting your site. You can find these via:
Reporting > Acquisition > All Traffic > Source/Medium
You can then copy and paste the domain names across. To separate each domain you will need to have a |. For example:
domain-one.com|domain-two.com|domain-three.com
Once you have added spam domains, you are ready to click “Save” and the filter will be applied. Be aware that this doesn’t take effect on historic data and will only be applied to future traffic. You will need to keep an eye on this as there will be other spam in the future. If you get a lot of a spam, you might need to create several filters (which is why I called this filter “Spam Filter 1” expecting that I will be adding more in the future) as you can only add so many characters to the filter pattern.
Get more stuff like this
Subscribe to our mailing list and get interesting stuff and updates to your email inbox.